http://msdn.microsoft.com/en-us/data/tools.aspx
To create a new SQL Project, you can either start by creating a new Project or create a new project from an existing database.
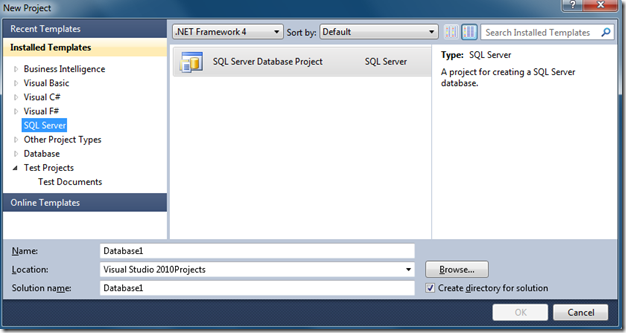
When creating a brand new project, be sure to choose the "SQL Server Database Project".

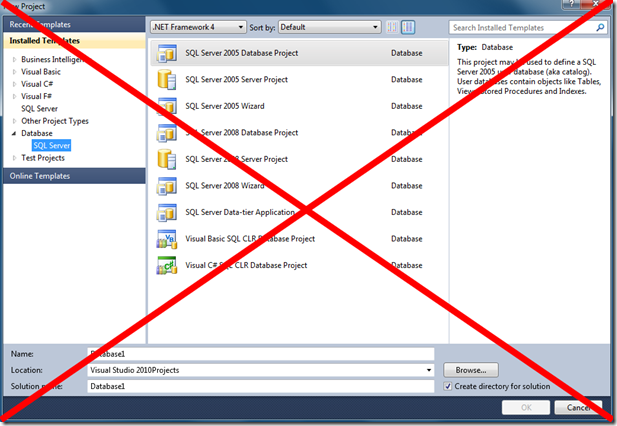
This is not the same as the Database -> SQL Server Project template. Using this will create a usable DB Project, but not the newer SQL Project.

Once you've created a new, empty project, you'll need to populate the project in order to be able to use it. You have a couple of options. You can import from an existing database, import from a Dacpac file, or just start creating your objects if this is a completely new project.
To Start a New Project from a Connected Database
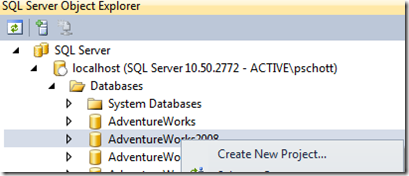
Open your "SQL Server Object Explorer" window. Connect to the database server containing the database for which you want to create a project. Right-click that database and choose the "Create New Project…" option.

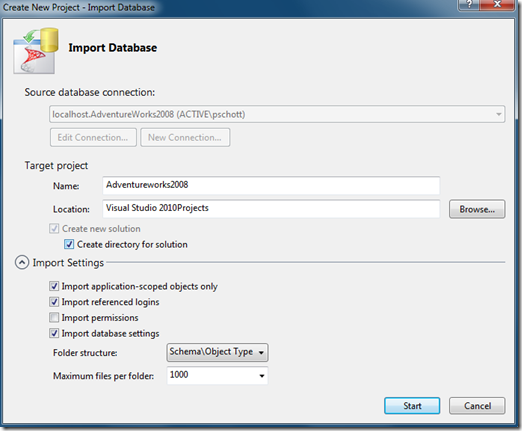
You'll then be asked to choose your project name, location, folder structure, and what to import. You can choose the defaults if you want. If you have an intricate permissions structure, you may want to import the permissions. If your logins, users, and permissions tend to vary by environment, you may want a different way to handle those. That will be covered in the "Permissions" section.
You'll have several options for folder structure. I'd choose the recommended structure unless you have a reason to choose something else. That will structure all of your objects under their appropriate schema, by object type. If you have a relatively simple database model, you may choose to structure your project by schema alone, object type alone, or just put everything in the root of the project. This only affects your project file structure, not your database structure.
Once you're satisfied with your settings, click the "Start" button to begin populating your project.

No comments:
Post a Comment